


This blog post shows how to set up the new Docker plugin for Intellij IDEA 14.1 on Ubuntu Linux 14.10.
**1. Install Docker
If you haven’t installed Docker already, use the following command to install it:
wget -qO- https://get.docker.com/ | sudo sh*2. Enable the HTTP-based Docker Management API
The standard Docker installation on Linux uses a Unix Socket for providing the management API. However, the Intellij Docker plugin requires a HTTP interface for communicating with the Docker server. In order to enable the HTTP-based management API, edit the file */etc/init/docker.conf and update the DOCKER_OPTS environment variable:
DOCKER_OPTS=’-H tcp://0.0.0.0:2376 -H unix:///var/run/docker.sock’
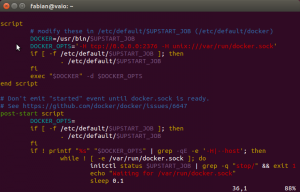
Then restart Docker with the following command
sudo service docker restart
3. Open the Example Project in Intellij IDEA
Like the Intellij IDEA Blog, we use the Wildfly Hello World Quickstart as an example application. Clone the quickstarts with git:
**git clone https://github.com/wildfly/quickstart.git
and open the quickstart/helloworld project in Intellij IDEA.
*4. Install the Intellij Docker Plugin
In the *Plugins dialog, click the Install JetBrains Plugins button.
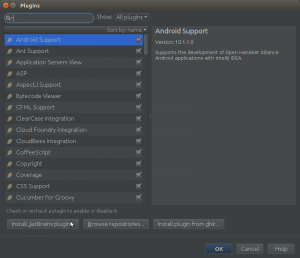
Search for the Docker Plugin and install it.
Restart Intellij.
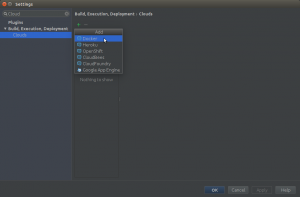
*5. Add Docker Cloud Settings
In the *Settings dialog, search for Cloud, and use the + button to add a Docker cloud setting.
The API URL setting corresponds to the configuration from Step 2, which is http://localhost:2376 (not https). The certificates folder is empty.
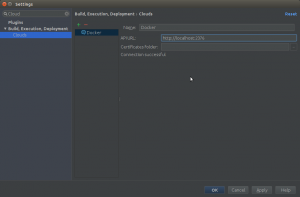
If everything is alright, the dialog shows *Connection successful</em> under the *Certificates folder.
*6. Create a Dockerfile
Create a directory *docker-dir in the project root, and create a file named Dockerfile with the following content:
FROM jboss/wildfly
ADD wildfly-helloworld.war /opt/jboss/wildfly/standalone/deployments/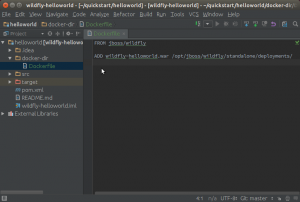
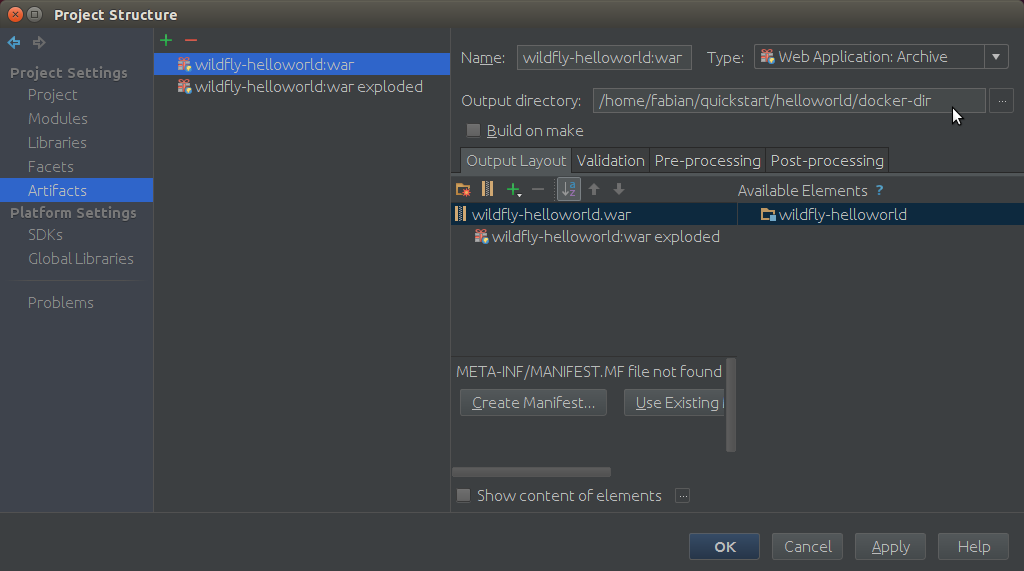
**7. Configure Target Directory for the WAR File
The file wildfly-helloworld.war must be created in the same directory where the Dockerfile is located. In order to do so, open the *Project Structure</em> dialog and configure the *Output directory</em> for wildfly-helloworld.war.
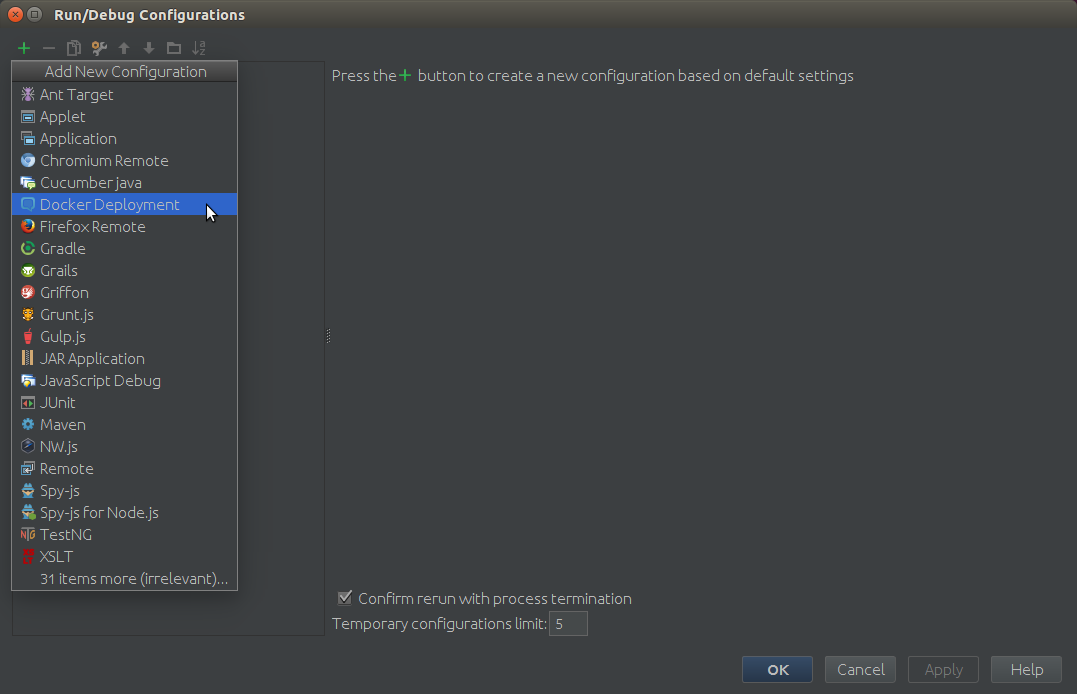
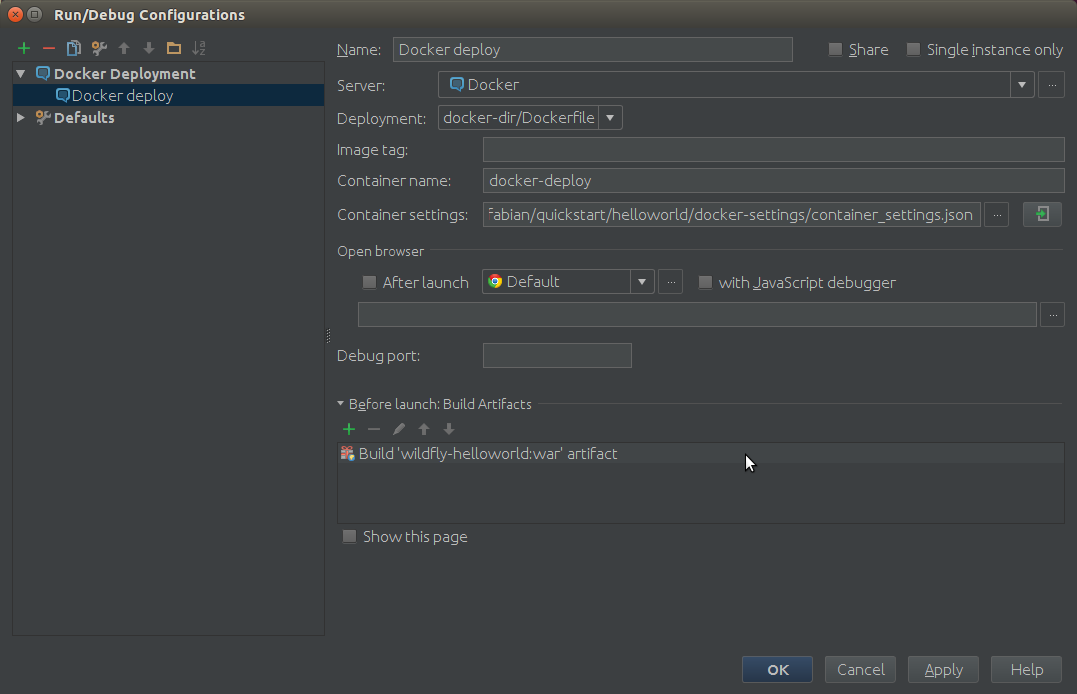
**8. Create Run Configuration
In the *Run/Debug Configurations</em> dialog, add a new *Docker Deployment</em> configuration
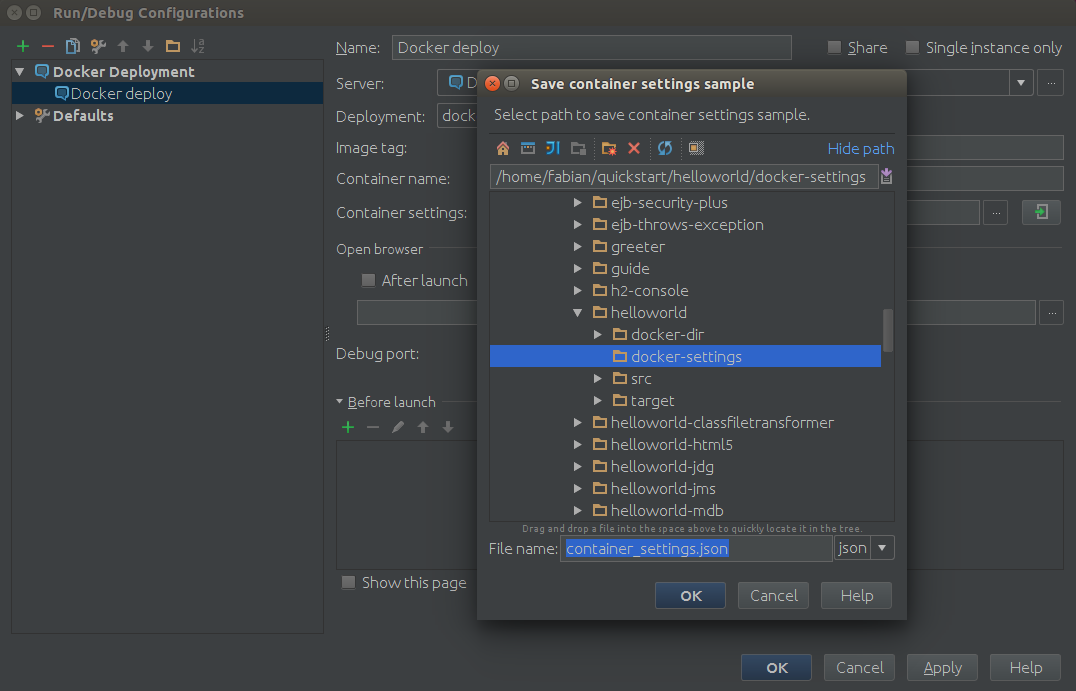
Set the *Name</em> to *Docker deploy</em>, and the *Container name</em> to *docker-deploy</em>.

Click the button to the right of *Container settings</em> to auto-generate a container_settings.json file. Create the file in a new directory called *docker-settings</em>.
As *Before launch</em>, add a step to build the artifact wildfly-helloworld.war.
**9. Run the Docker Container
When run for the first time, the startup may take a long time, because Docker needs to pull the jboss/wildfly image from the Docker hub.

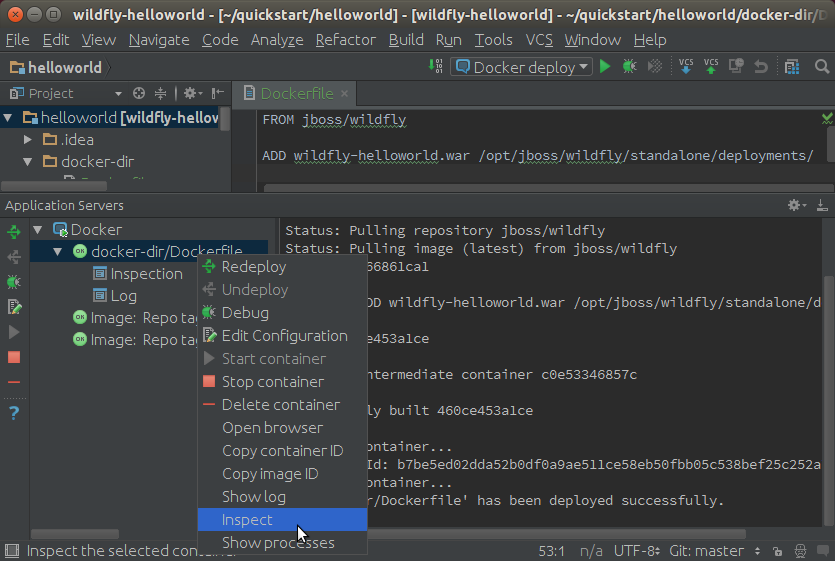
**10. Find Out the Container’s IP Address
Run the docker inspect command by right-clicking on the running container. The output includes the container’s IP address.
**11. View in Browser
The hello world application can now be accessed with a Web browser on http://172.17.0.2:8080/wildfly-helloworld/HelloWorld (depending on the container’s IP address).
